
One of the big headaches in getting from a completed manuscript to a completed book is the ISBN and barcode. Getting an ISBN is a post or two of its own, but assuming you have them, people often want to charge you an arm and a leg (or a web!) to take a few digits and make a barcode that represents them. Every product on the planet has one, so they shouldn’t be that hard to get.
It turns out that they’re not– the free software community (which we like, depend on, and try to contribute to when we can) has all sorts of nice tools, including bar code generators. A nice one that I’ve found is here at tux.org. It runs online and generates an .eps or .pdf that you can paste onto your cover. If you really want to run it locally, you can also download the code (it’s in python) and run it yourself.
It has detailed instructions with a lot of options. Fortunately, the author has put in default values that are generally good choices. The things you want to pay attention to are:
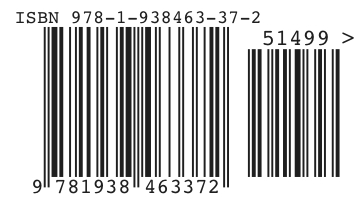
- Make sure you put in your ISBN correctly! If you leave the default value in to test it, it’s nice enough to put a big notice on the code it generates. But it’s still 13 digits plus a price code that you need to check. Check it twice, then check it again.
- Put in a price code if you want one – the default value (90000) says “no suggested retail price”. If you’re in the US, your price code should start with a 5 and then be the 4 digits of the price with no decimal points (e.g. a $14.99 book will be 51499). If you’re in another country you can probably look at a book printed there and figure it out, or search around for a definitive answer. There’s a link from the detailed instructions that tells all about price codes.
- Don’t mess with the colors. Many barcode readers will read things done in a range of colors, but many won’t, so stick to black and white and you’re probably ok.
- Read the notes about scaling– you can rescale the codes to some limited extent, but be careful! Even if it makes the back of your book look less nice, it makes it easier to sell.
- As he notes, there’s no warranty on what he generates. We don’t make any warranty about it either. That said, it does seem to make a well behaved barcode.
- If you’re going to use it in some format other than .eps, save it at a very high quality. Some “lossy” image formats (I’m talking about you .jpg) can fuzz out the sharp edges and even put faint greyscale noise into the white spots. Barcode readers may get upset at you for this– they like nice sharp lines and high contrast.
- TEST IT BEFORE YOU USE IT! Yes, I’m yelling. Print it on a piece of paper at the scale it’s going to be used with the stuff around it that you’re going to put there (it needs a bit of whitespace around it), then read it back. You can read it back with a smartphone app (my goto barcode reader is Red Laser. It’s available free for most platforms and works well. If you know someone who can read it with a laser, even better. Or find a really geeky friend with a Cuecat.
That about covers it for basic barcode generation– We’ll have some posts in the near future about getting ISBNs and some about using QR codes (those funny square “barcodes” that are popping up all over). We like to use QR codes at book fairs because people can use their phone camera to go straight to our website and bookmark it or find the book they want and get it in the format they want right there. It saves us from having to deal with selling books at a book fair table.
